
Updating Anki Decks Without Losing your Progress
Anki reviews are a strange thing. You may not look forward to doing them, but once you get them done, you want that progress saved, forever. When I originally studied with Anki I always thought to myself “what would happen if I lost all my progress?!” That would be the end of the world.
Lately on Jalup I’ve offered various up dates (audio and revised content) to decks that were originally created several years ago. People that have been using these decks for years would like these major updates, but not at the cost of losing review progress on all their cards.  I had been asked repeatedly in the past if there was a way to solve this. I didn’t have an answer. I knew that there must be a way, because Anki is extremely customizable. But no search on the internet helped, and I couldn’t figure it out no matter how hard I tried. Things have changed though. This was too big an issue. After a mountain of trial and error, I’ve reached a solution.
The following guide will take around 30-60 minutes to go through, depending on your experience with Anki. It’s not necessarily hard, it just has many steps. I also wanted to be over-inclusive, because I know some people aren’t that familiar with Anki or spreadsheets. You can skip through parts that are obvious to you or you don’t need.
1. Backup your current Anki deck
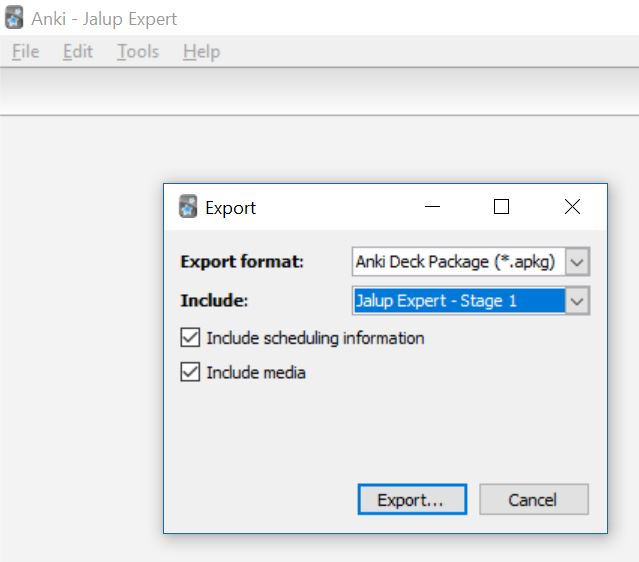
When you make a big change on Anki, always back up your existing deck, in case something goes wrong. From the top left, Click File > Export; choose the deck you want to backup, making sure everything is checked off, and then click Export. Remember where you saved the deck.
2. Open up your original Anki deck you want to change
For the purpose of this guide, I’m going to use Jalup Expert Stage 1.

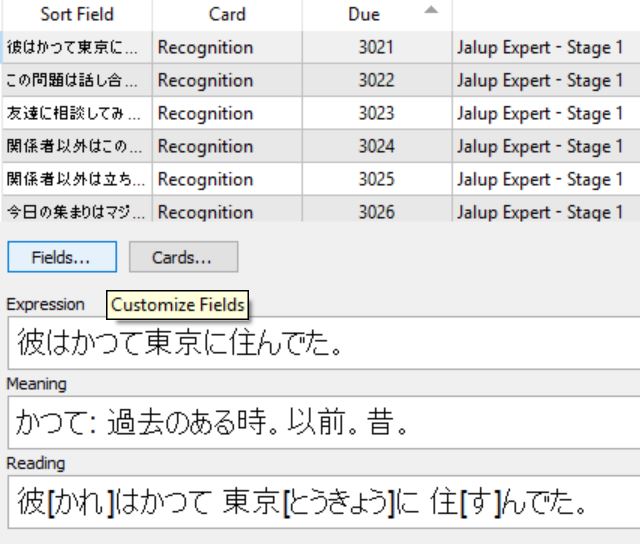
I started the deck, and learned 20 cards (all graded 4), so that there are some cards that already have progress and are scheduled. You can tell this by the date being showed under due instead of the default Due #.

It is much easier to add the new audio/content to one merged deck (containing thousands of cards), rather than go through each stage of 250 cards individually. So I highly recommend you merge stages if you haven’t already. I’m just doing one stage here for simplicity.
3. Add a new blank field to your deck called Audio
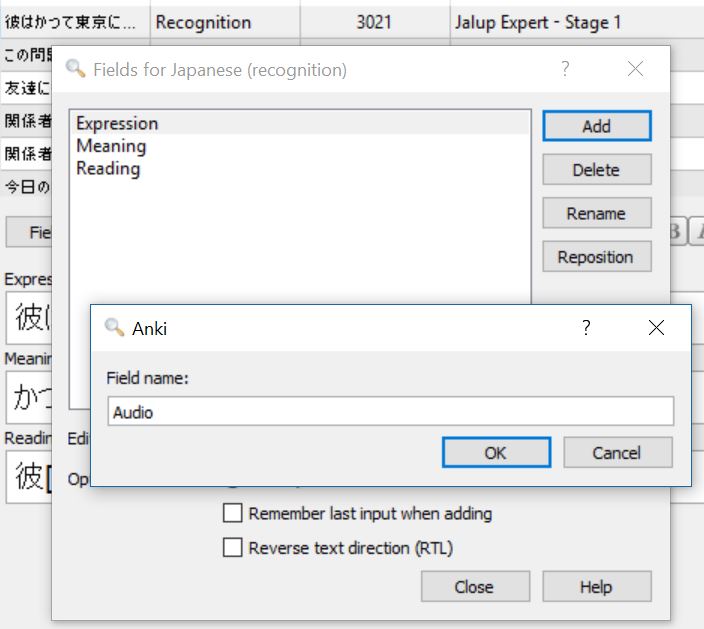
While browsing your cards, click on the first card in Expert, and then the Fields button.
Click the Add button and name your new field Audio. Then click Okay.
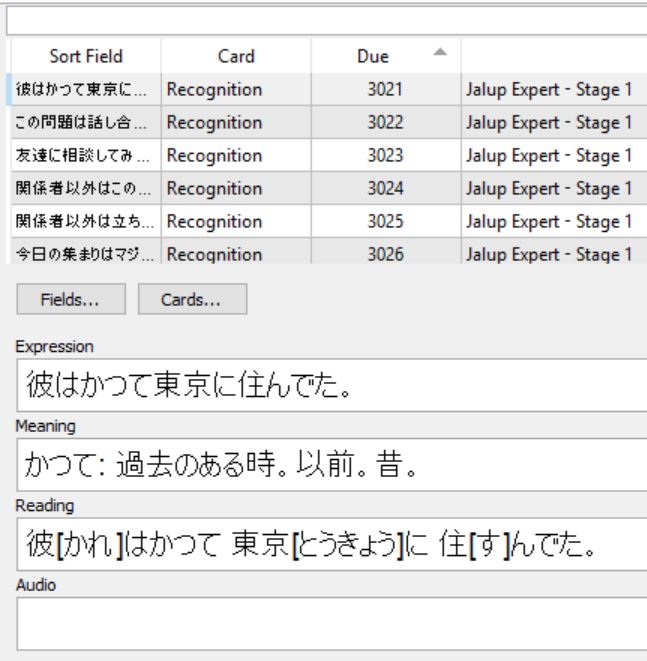
You should now have a blank audio field added to all of your cards.
If you have Expert merged with other decks like Beginner, Intermediate, etc, those cards may have “Audio” and “Notes” fields depending on when you purchased them.
(This is what newly updated Jalup Beginner/Intermediate/Advanced cards look like)
This doesn’t change anything. Just click on the first of your expert cards, add in the audio field as shown above. Only your expert cards will have the Audio field added at the end. All of your current Beginner, Intermediate, Advanced cards with their respective extra fields will remain the same.
4. Add two more blank fields
Just like you added Audio above, you are going to add 2 more new fields:
Notes
Expression NEW
*Fields > Add > (enter field name) > Close
After you add these two in, here is what your fields will look like:
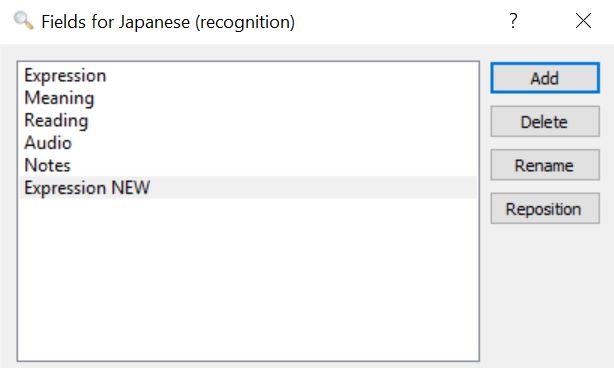
Why are we doing this? All new updated Jalup decks have a Notes field. This made it easier to split up the definition and the explanatory examples. You’ll need this field when updating from a new deck version. Expression NEW will be explained further below.
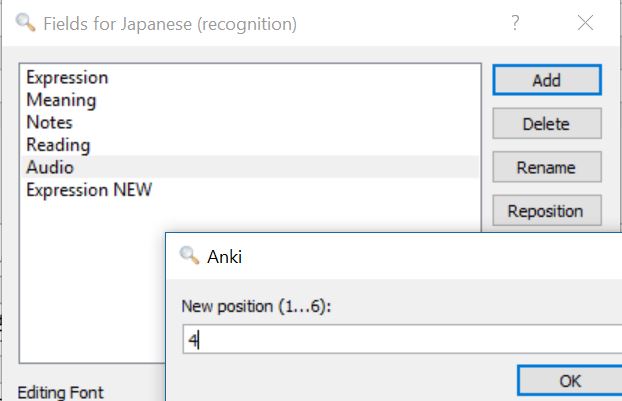
5. Reposition the fields
We want our fields to be in the following order:
Expression
Meaning
Notes
Audio
Reading
Expression NEW
Click on Notes > Reposition > (enter the number 3) > OK
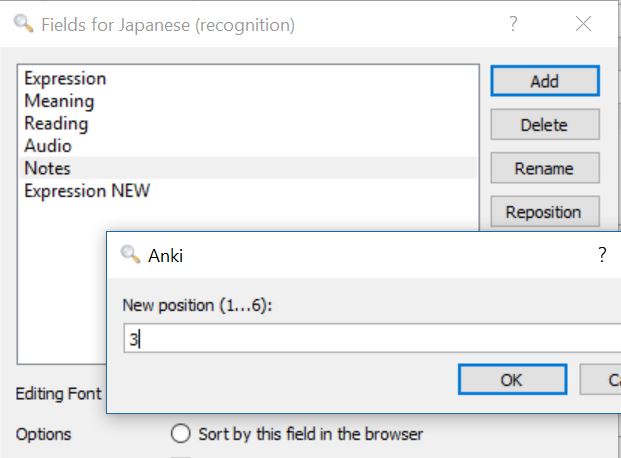
This moves Notes to the 3rd position.
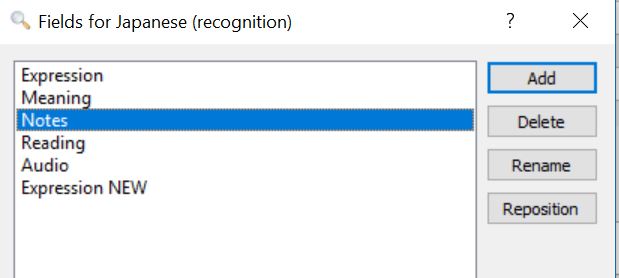
Next, move Audio to the 4th position.
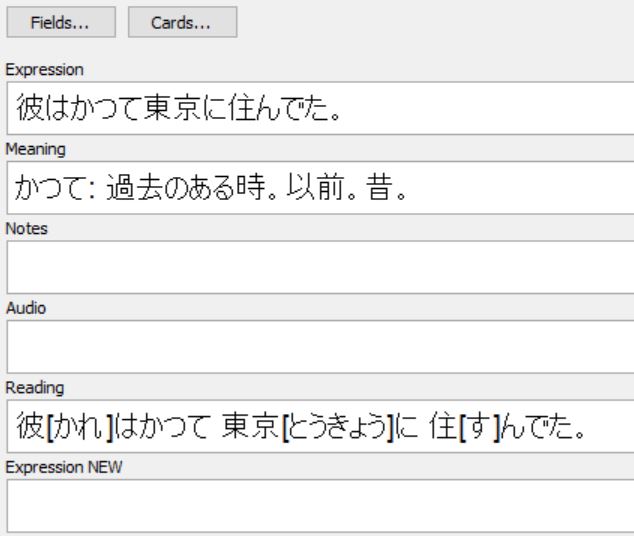
Here are the final results.

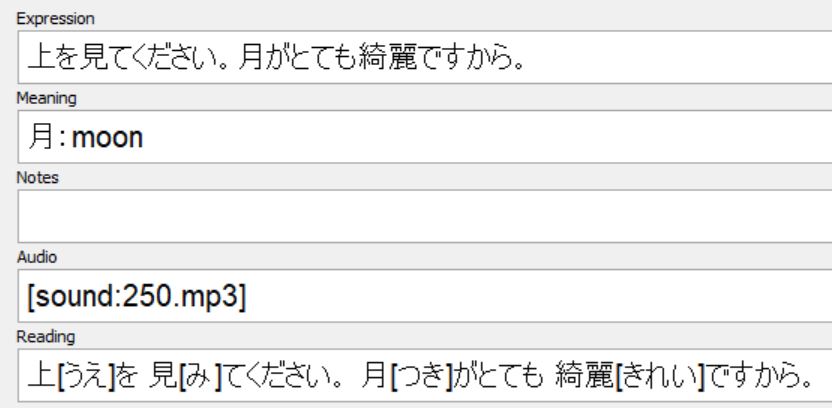
Then hit Close. Check to make sure your cards look like this:
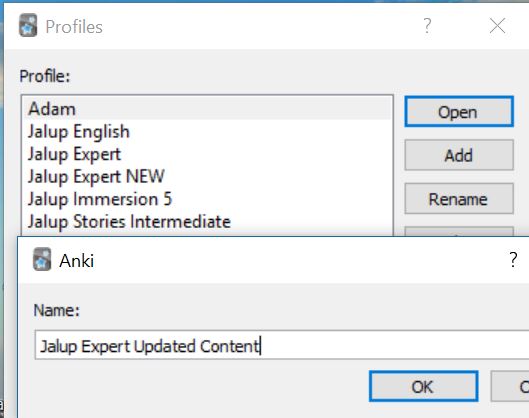
6. Create a new profile
You need to exit away from your current deck you are working on.
In the top left, File > Switch Profile. Click Add and name your new profile whatever you want (I’m calling it Jalup Expert Updated Content). Hit OK.
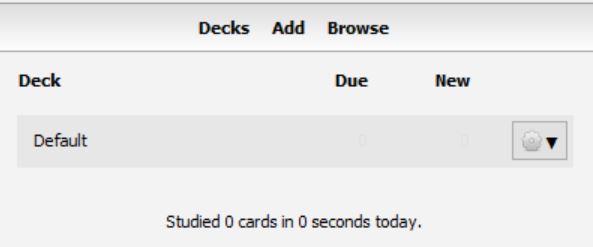
Double click on the profile to enter it. You should be sent to the default starting screen.
If you haven’t already, purchase a deck update on Jalup (links at the bottom of this post), and download the new fresh version, with updated content and audio. Go to wherever you download it, and double click on the Anki deck (the grey Anki icon with the deck name). This will automatically import the new deck into this new profile Jalup Expert Updated Content.

7. Open up your Anki2 Folder
Your Anki2 folder on your computer is where all your profiles, decks and media for your decks are stored.
This can be accessed by:
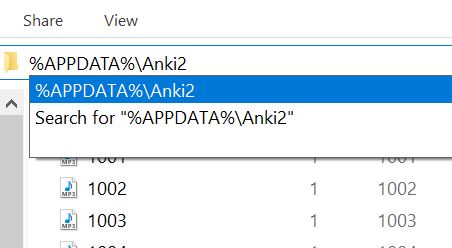
On Windows, the latest Anki versions store your Anki files in your appdata folder. You can access it by opening the file manager, and typing %APPDATA%\Anki2 in the location field. Older versions of Anki stored your Anki files in a folder called Anki in your Documents folder.
On Mac computers, recent Anki versions store all their files in the ~/Library/Application Support/Anki2 folder. The Library folder is hidden by default, but can be revealed in Finder by holding down the option key while clicking on the Go menu. If you’re on an older Anki version, your Anki files will be in your Documents/Anki folder.
If this is confusing, in Windows, you just right click on the folder icon on your computer, open a file explorer, and copy and paste %APPDATA%\Anki2 in the address bar. Hit enter, and you should be brought to your Anki2 folder.
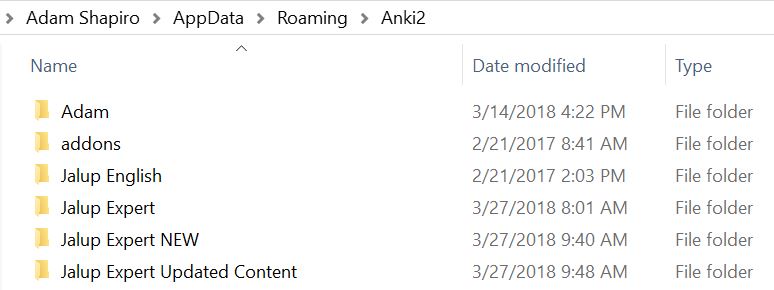
Here you’ll see a list of your user profiles, and possibly an addons folder depending on plugins you use.
For this tuorial:
“Jalup Expert” is my original profile (where all my original progress is)
“Jalup Expert Updated Content” is my new profile (where I uploaded the newest version)
8. Make sure you are closed out of the program Anki completely
Anki warns about copying or moving your media collection while Anki is open. I’m not sure if this refers to adding media into the folder, but just to be safe, close out Anki if it is running.
9. Open up your Collections.Media folder
Double click on your newly created profile (Jalup Expert Updated Content).

Double click on your collection.media folder
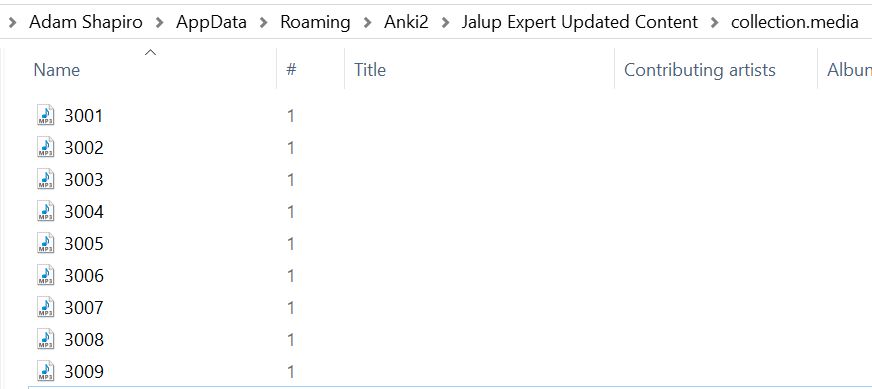
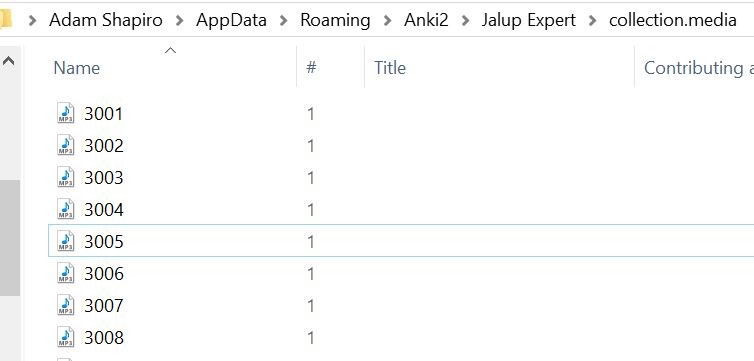
Inside are the audio files from the update. Highlight all the mp3 files (Ctrl or Cmd A), and then copy them all (Ctrl or Cmd C). Go back 2 folder levels, to your profile list. Open up the original profile you always use. Then open up its collection.media folder, and paste all of those copied mp3s into this folder.
You can close out all these folders once you are finished, as you won’t be using them again.
10. Open Anki and export your regular deck
Open Anki again, using your original profile.
You are going to export the relevant deck using the same process as when you backed up your deck in Step 1 of this guide. Except this time, you are exporting the .txt version of this file.
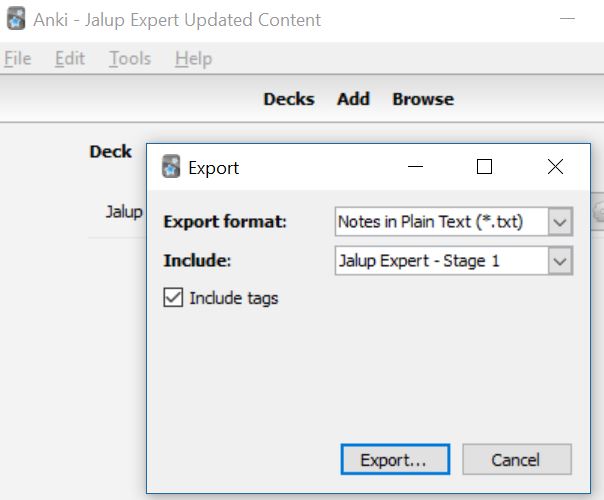
On the top left of the screen, File > Export; select the Export Format as “Notes in Plain Text” and set Include to be the deck you plan to add the audio/new conent to. Don’t leave it as “All Decks.”

You should end up with a .txt file. I called mine Jalup Expert Notes.txt.
11. Switch profiles, and export the updated content deck
Switch profiles to your updated content profile. Repeat the above, exporting this new deck. I am exporting from my updated content profile called Jalup Expert Updated Content.
I called this new .txt file: Jalup Expert Notes File Updated Content.txt
*After this, you can delete the updated content profile you were using and updated content deck from Anki.
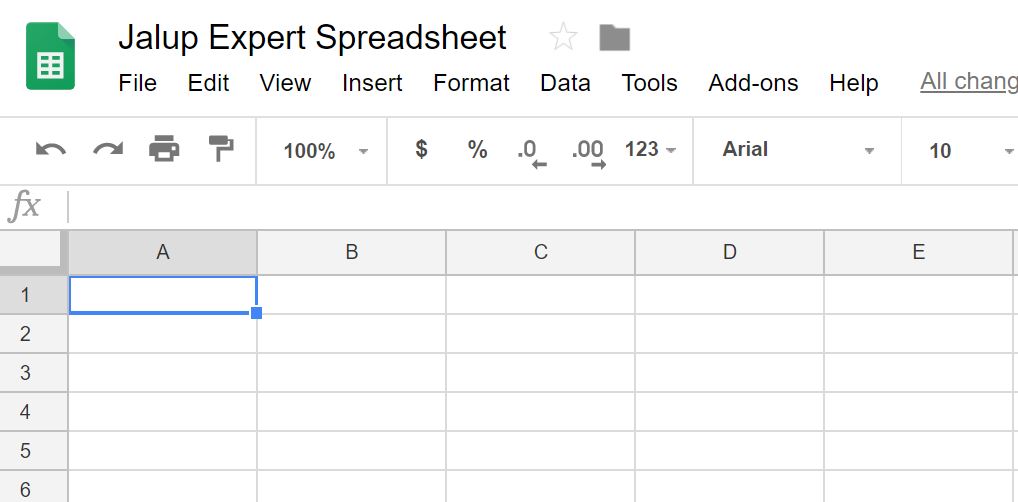
12. Create a blank spreadsheet
I’m going to use Google Sheets to explain this part, but you can do this with any spreadsheets program (like Excel).
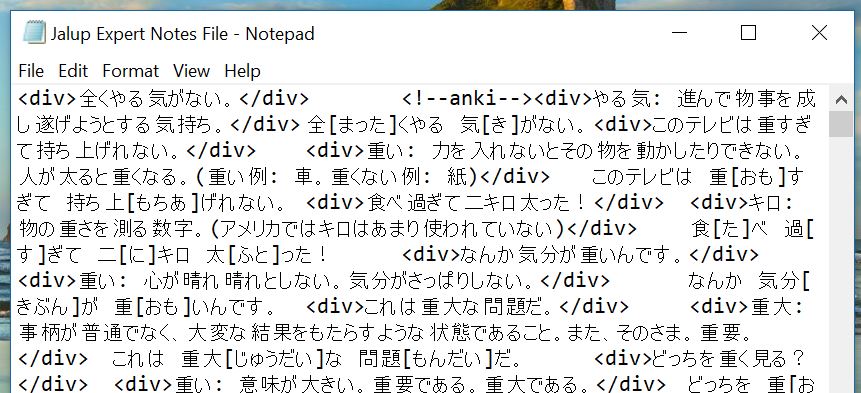
13. Open your original profile exported text file and copy all of the text
Open up the original .txt file, select and copy all of the text (Ctrl or Cmd A followed by Ctrl or Cmd C).
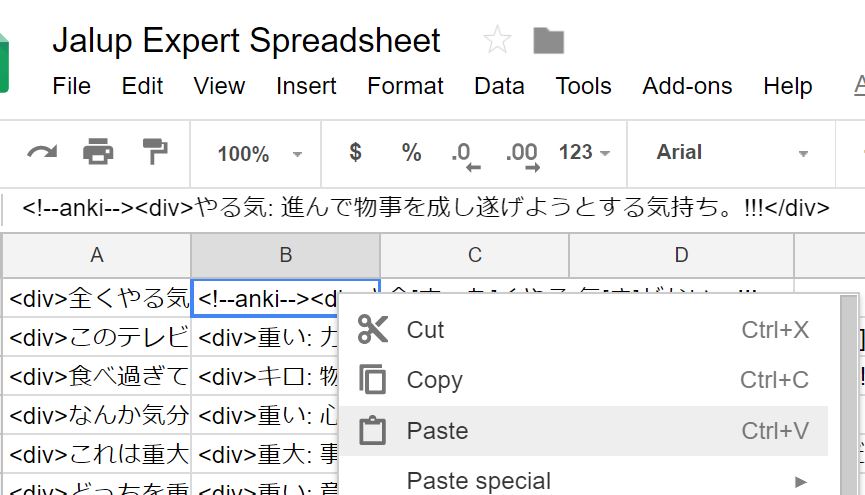
14. Paste in your newly created spreadsheet
Click on the first cell A1. Then then click Ctrl or Cmd V to paste all of that text in. It should naturally fill out 3 columns, covering your expression, meaning and reading fields from your original deck. It’ll look crowded and may be filled with html tags like <div>. This is normal.

15. Repeat steps 12-14 for your updated content .txt file you exported
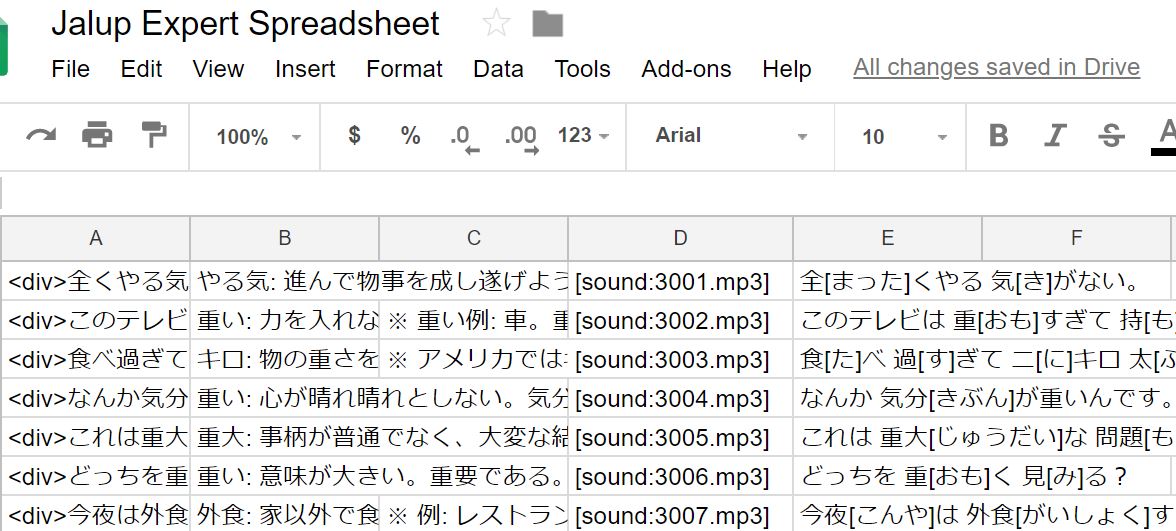
Repeat steps 12-14 above. Create a new spreadsheet. This time you are going to copy the information from your second exported .txt file, into this new spreadsheet.

You’ll notice a few things. First, there are 5 columns, corresponding to each of the 5 fields mentioned above. You’ll also see it looks quite a bit different than your original deck (for example there are no <div> tags). This is due to how the original decks were created. Updating them without these html <div> tags won’t cause any problems.
16. Copy all of columns B through E on your Updated Content spreadsheet
You can do this in a number of ways, but I find holding down Ctrl or Cmd while clicking on each letter (B, C, D, E) easiest. Then you just hit Ctrl or Cmd C. Make sure this is from your updated content spreadsheet.
17. Paste columns B through E on your Original Spreadsheet
In your original spreadsheet, click on column B1, then press Ctrl or Cmd V. You can also right click on it and hit paste as well.
With this, your original spreadsheet will have columns B through E replaced with the updated content spreadsheet. The only column that will remain unchanged is column A.
18. Repeat steps 16-17
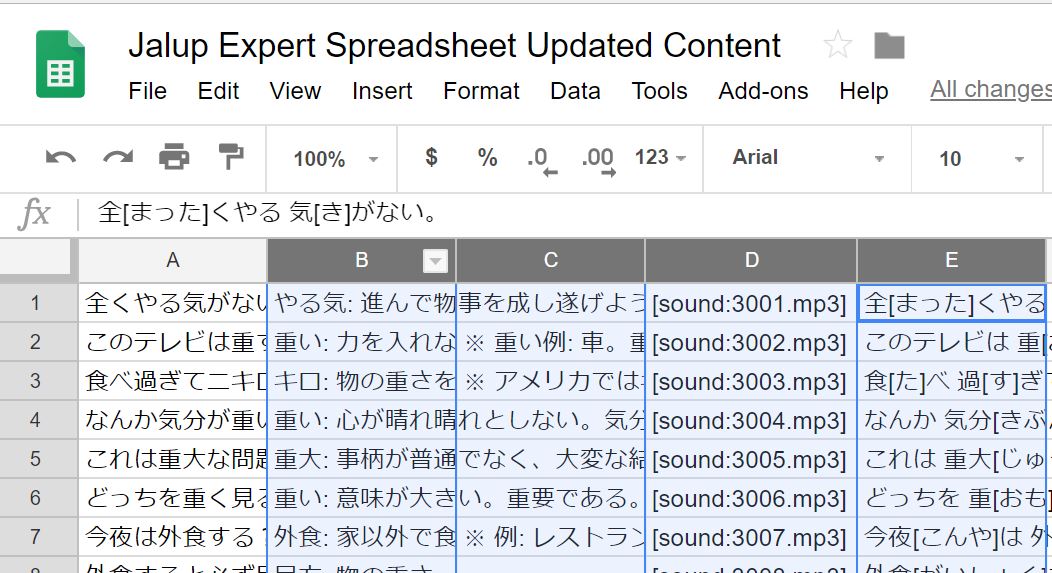
Using steps 16-17 above, you are going to copy column A from Updated Content spreadsheet and paste it to column F of your original spreadsheet.
As of the writing of this guide, Jalup Expert hasn’t been updated yet, so I’m going to artificially add in exclamation points to the end of each cell in column A of the Updated Content spreadsheet. I’m doing this so you can see that the updated content is new and different from the original content.
Click on cell F1 this time in your original spreadsheet, Ctrl or Cmd V to paste in the content from Updated Content spreadsheet Column A.
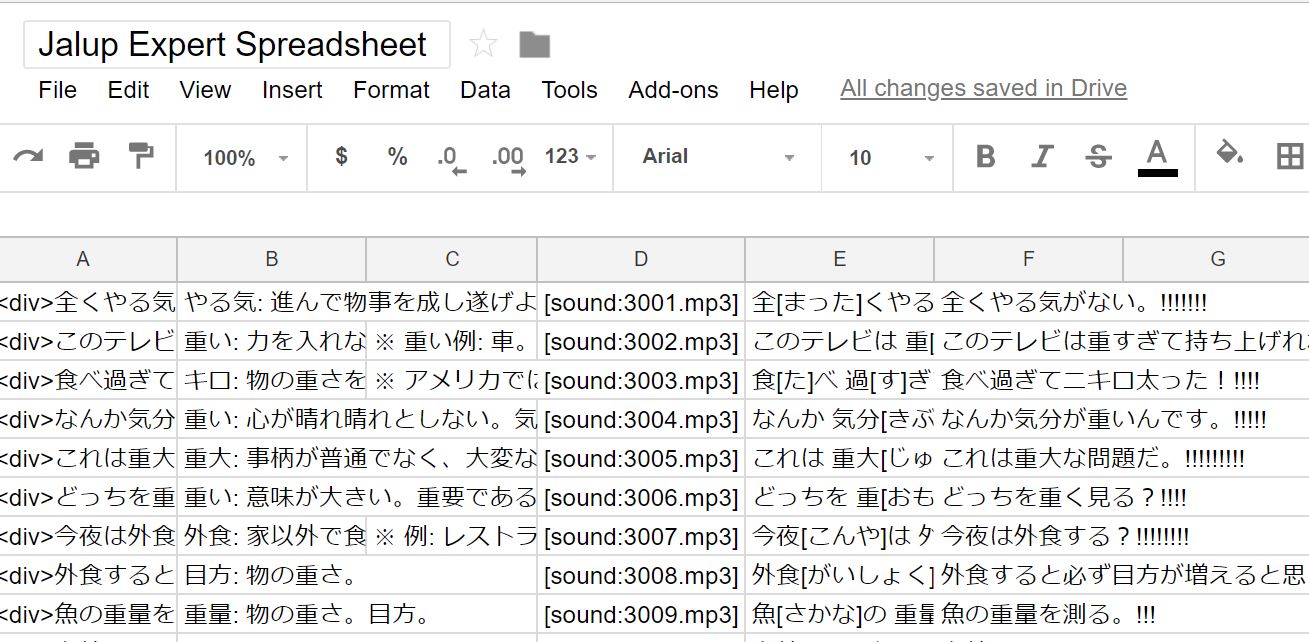
For your reference, the content of this spreadsheet is as following per column:
A: Expression (from your original cards)
B: Meaning (from updated content)
C: Notes (from updated content)
D: Audio (from updated content)
E: Reading (from updated content)
F: Expression NEW (from updated content)
You can now delete the Updated Content spreadsheet, as this won’t be used anymore. You will be using the original content spreadsheet (for me: Jalup Expert Spreadsheet), that has these 6 columns set up.
19. Download or save your original spreadsheet as a .csv or .tsv file
You need to convert your file type to either a .csv file or .tsv file. This makes each row separated by either commas or tabs. It doesn’t matter which you choose as Anki automatically detects which version is used. I’ll use .csv for this tutorial.

My .csv file is called Jalup Expert Spreadsheet – Sheet1.csv
20. Set up the import of this new .csv file to your original Anki deck
In your original profile with your current decks, go to the deck screens.
File > Import; then choose the newly created .csv file.
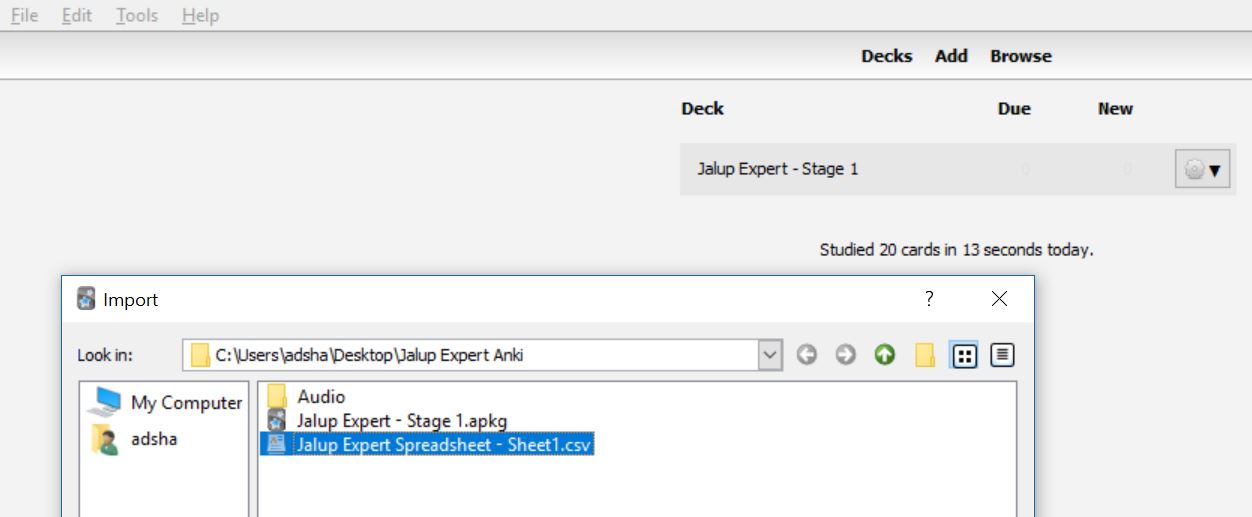
The default import screen will pop up. Make sure the Deck field is the original deck you plan on updating (mine is Jalup Expert – Stage 1). If it is not, change it to the correct deck.
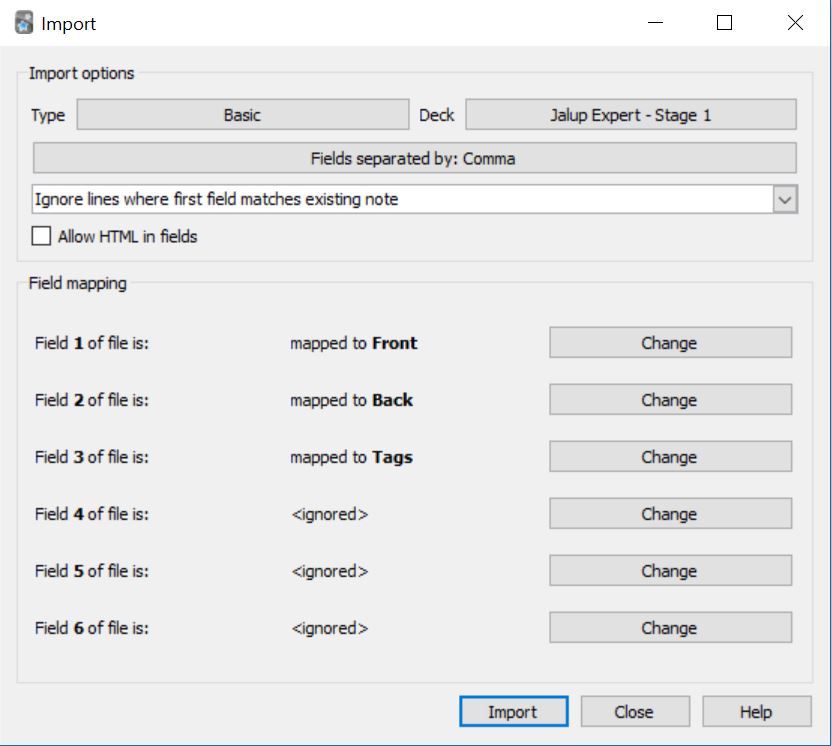
Click the Basic button and change it to Japanese (recognition), and then press the Choose button.
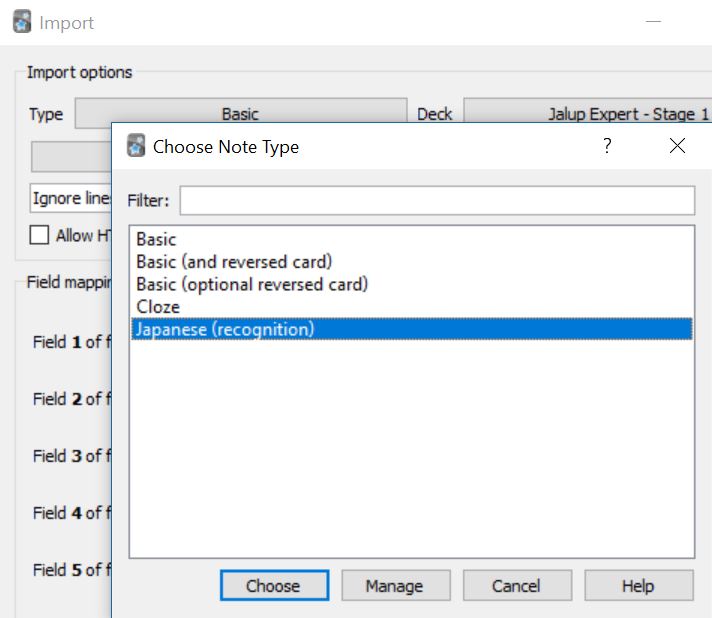
You should now see all the fields added that you had created, aligned properly in this order:

Click “Ignore lines where first field matches existing note.” You need to change it to “Update existing notes when first field matches.”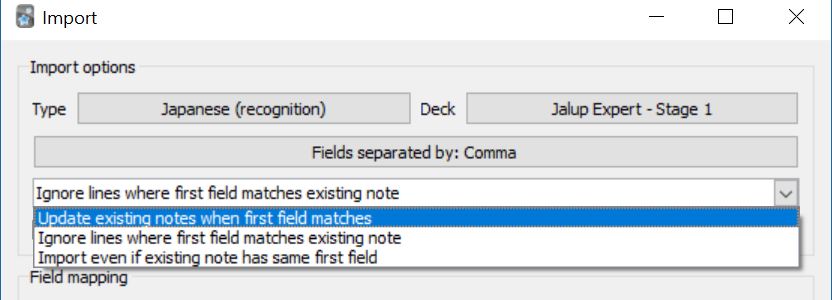
This part is extremely important, and is what allows you to keep your progress.
What this does is it checks your original deck’s first field (Expression) against the spreadsheet you are importing (and its column A). This is why we copy and pasted all columns from the updated content spreadsheet, but not column A on our original spreadsheet. If column A it isn’t exactly the same, the spreadsheet import will merely add new cards, and not update your existing ones. Our extra column F is how we are going to work around updating column A with new content.
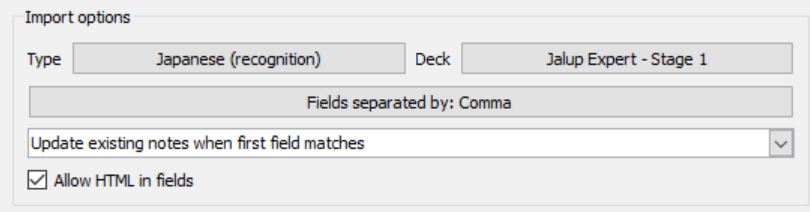
Finally, you need to place a check on “Allow HTML in fields.”
21. Click the import button
Make sure your import settings screen, which you configured in step 20, looks exactly like this:

Click import.
22. Make sure the import completion screen is correct
If everything went well, you will get the following finished box after completing the import. Depending on the amount of cards you are updating, you’ll get a different number. I did this for 250 cards. You must get
0 notes added
250 notes updated (or whatever your number is)
0 notes unchanged
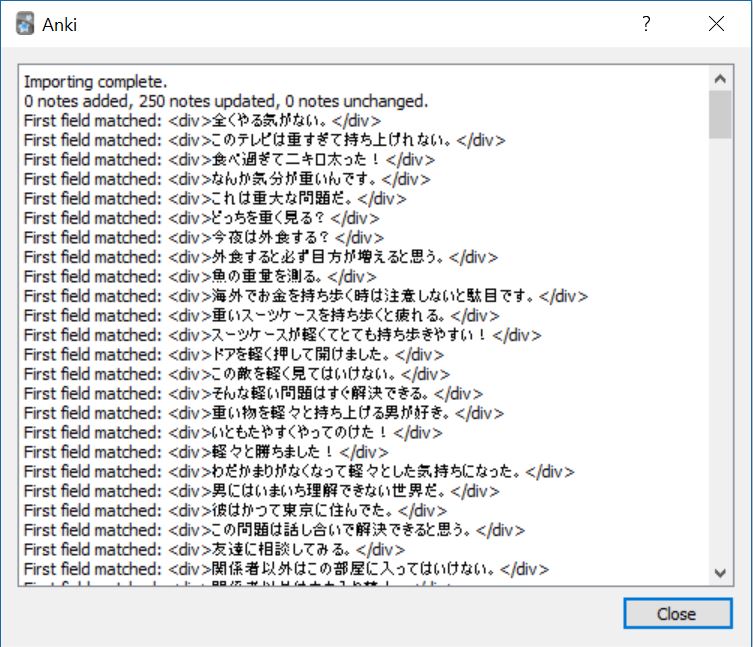
This is letting you know what the first field of your deck and your imported original spreadsheet A column are exactly the same. If this is not what your screen looks like, you did something wrong along the way.
Click Close.
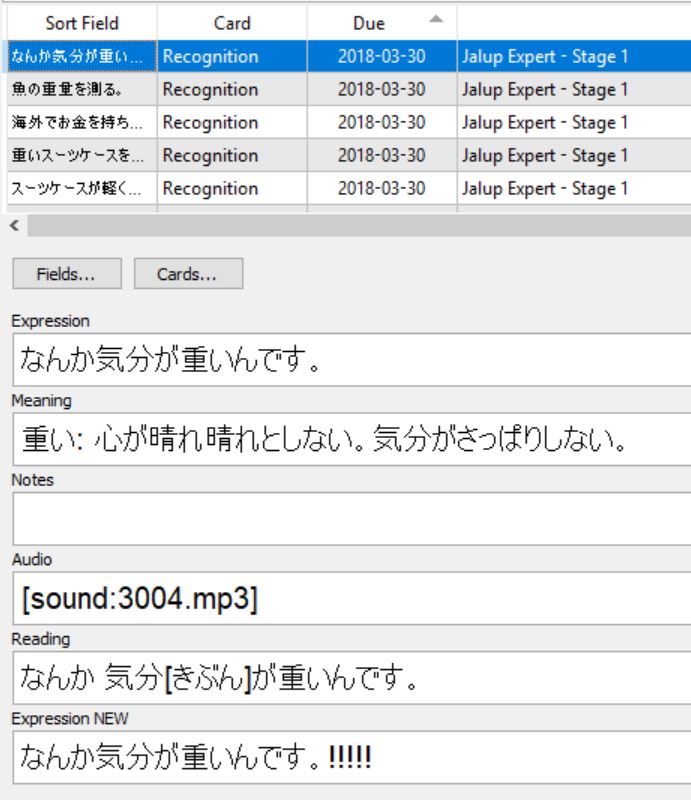
23. Check your deck
Assuming you saw the above box, when you search through your deck, your original due dates should all remain in tact. You should now have your other fields Notes (where applicable), Audio, and Expression NEW filled out for all of your cards.
24. Change Expression NEW to Expression
You want your Expression NEW to actually be the Expression field. Expression NEW is only a separate field because of the technique we used above. First, change your current Expression field, renaming it Expression OLD.
With an expert card highlighted, click Fields > (click Expression) > Rename > Expression OLD > OK
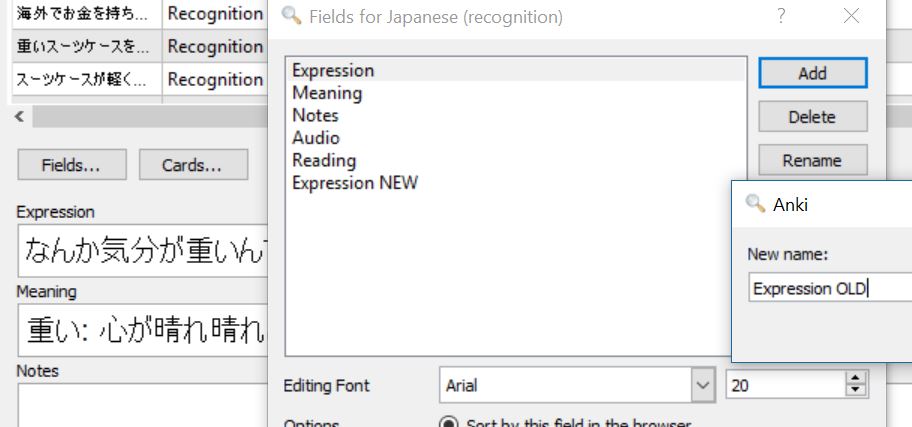
It will look like this:
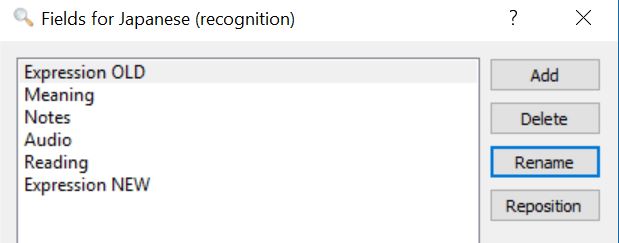
Now select Expression NEW, and rename that to Expression:
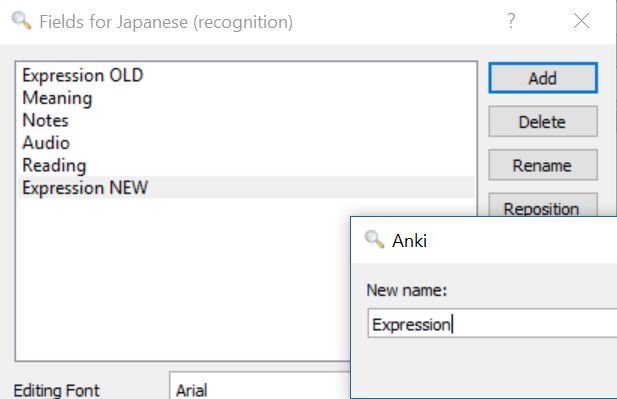
Reposition this newly named Expression field to position 1.
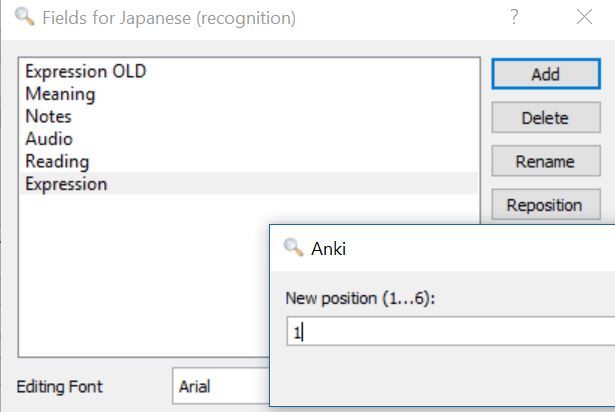
Then hit delete, while highlighting Expression OLD
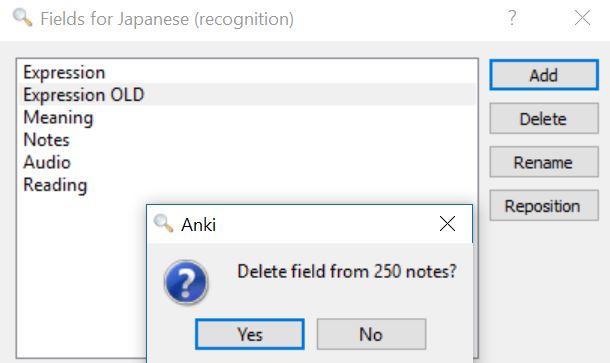
Hit Yes, and then Close.
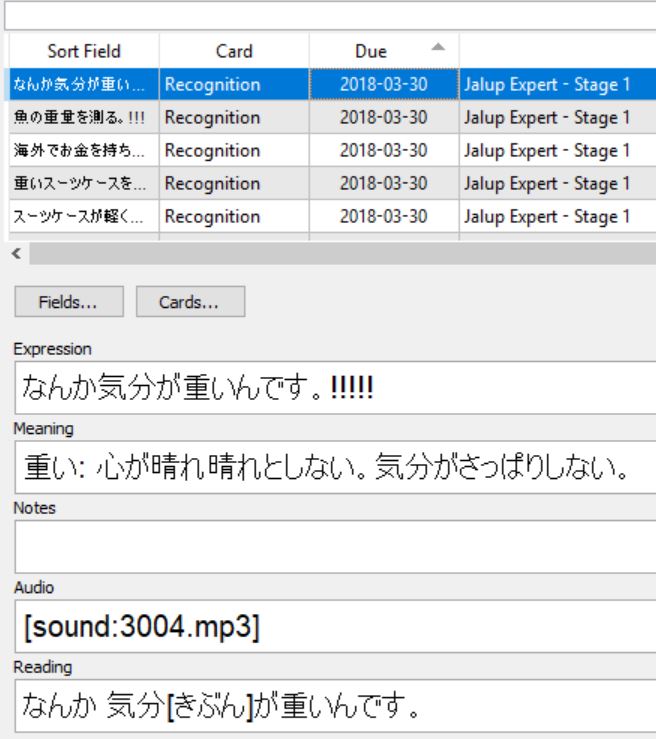
The final result is the Expression field is now what was in your Expression NEW field, and the original expression field has been deleted. You can see below that all the new sentences that we added exclamation points to (to show that it is the updated content) are properly in the Expression field.
25. Add in Expression, Notes and Audio to Card coding
While you have an Expert card selected, open up the card coding field by clicking Cards next to the Fields button
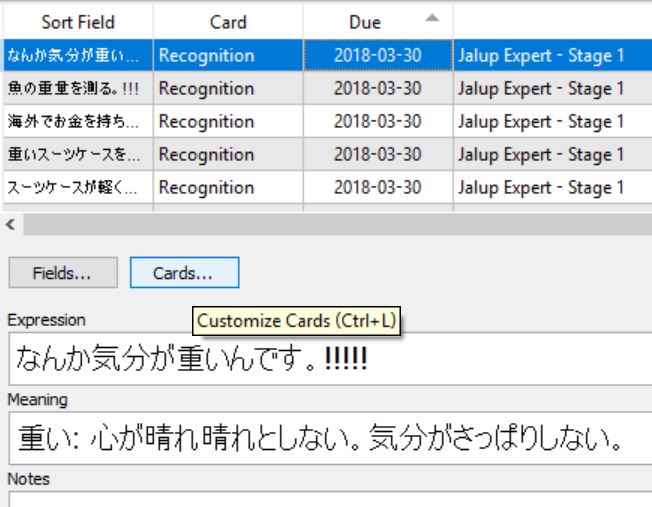
Your card template will look something like this:
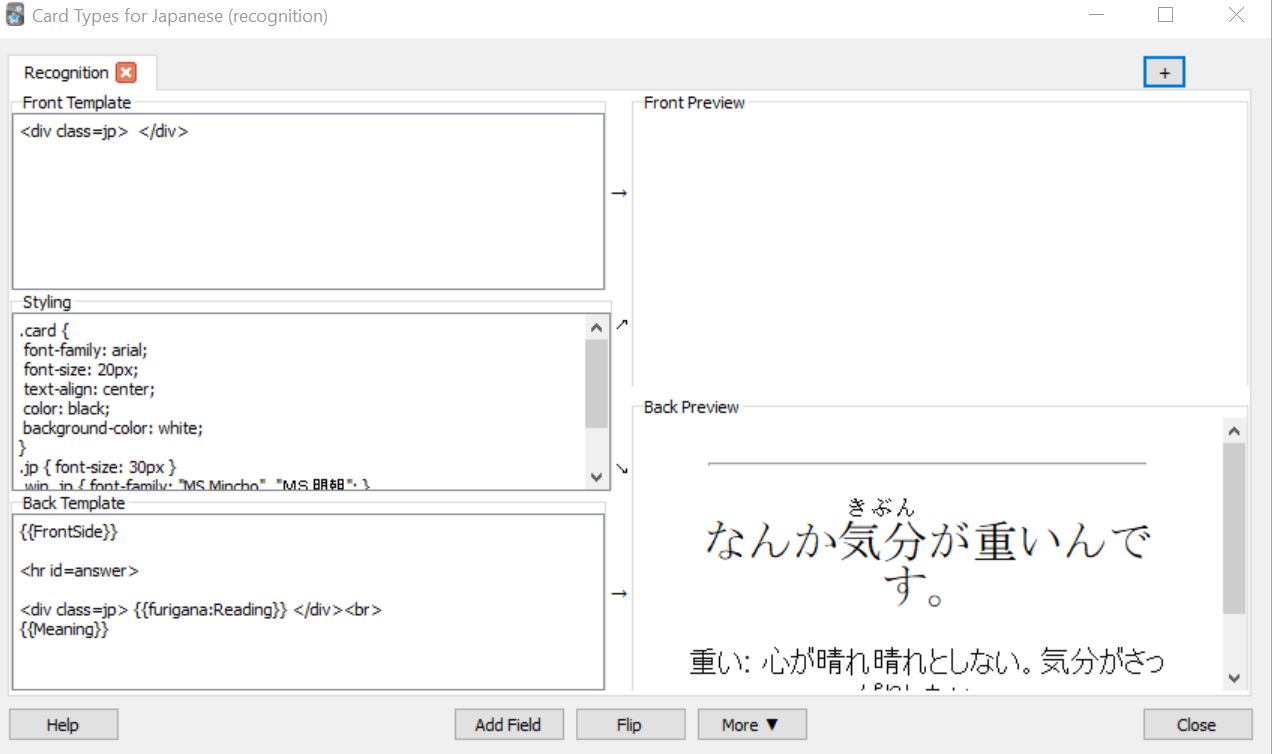
You need to add in the following text to the Front Template in between the divs
{{Expression}}
And the following text to the bottom of the Back Template after {{Meaning}}
<br>
{{Notes}}
{{Audio}}
It should look something like this:
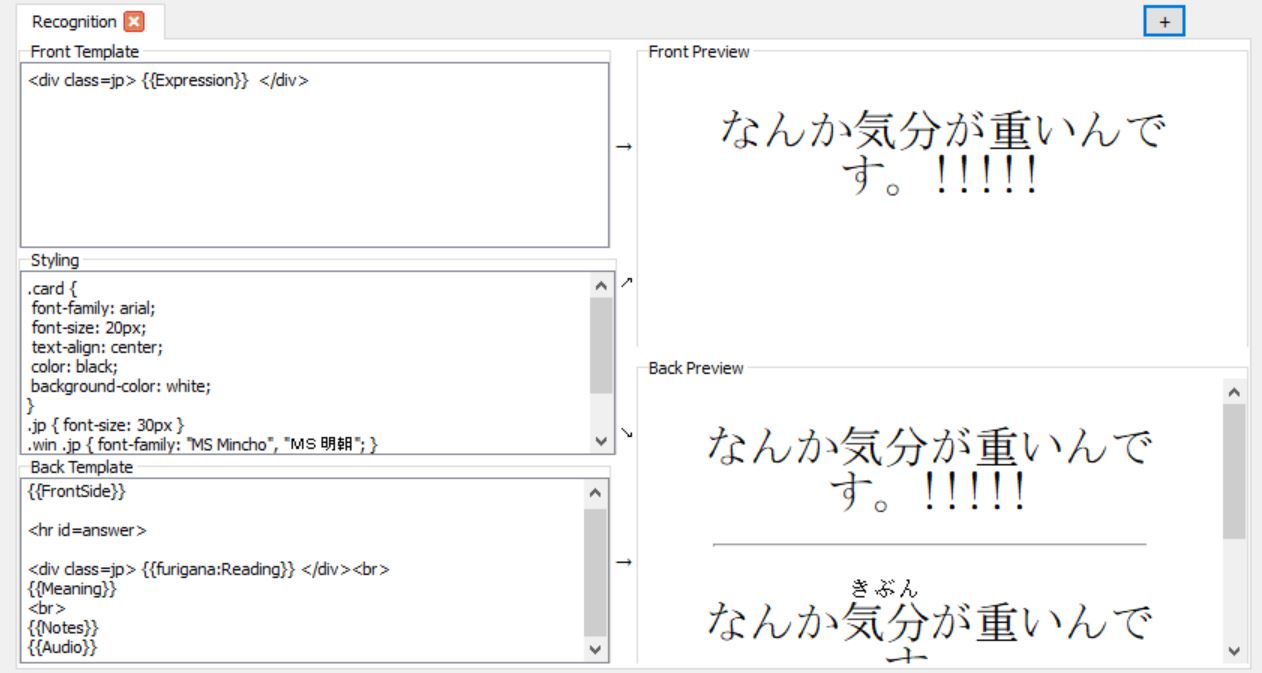
Your templates may look slightly different depending on how you organize your cards. Just make sure the {{Expression}} is on the front and {{Notes}} and {{Audio}} are on the back.
Then click Close. This will add {{Expression}}, {{Notes}}, and {{Audio}} to all your cards at once, so you don’t need to do this for each card.
You’re Done!
Test out your cards.
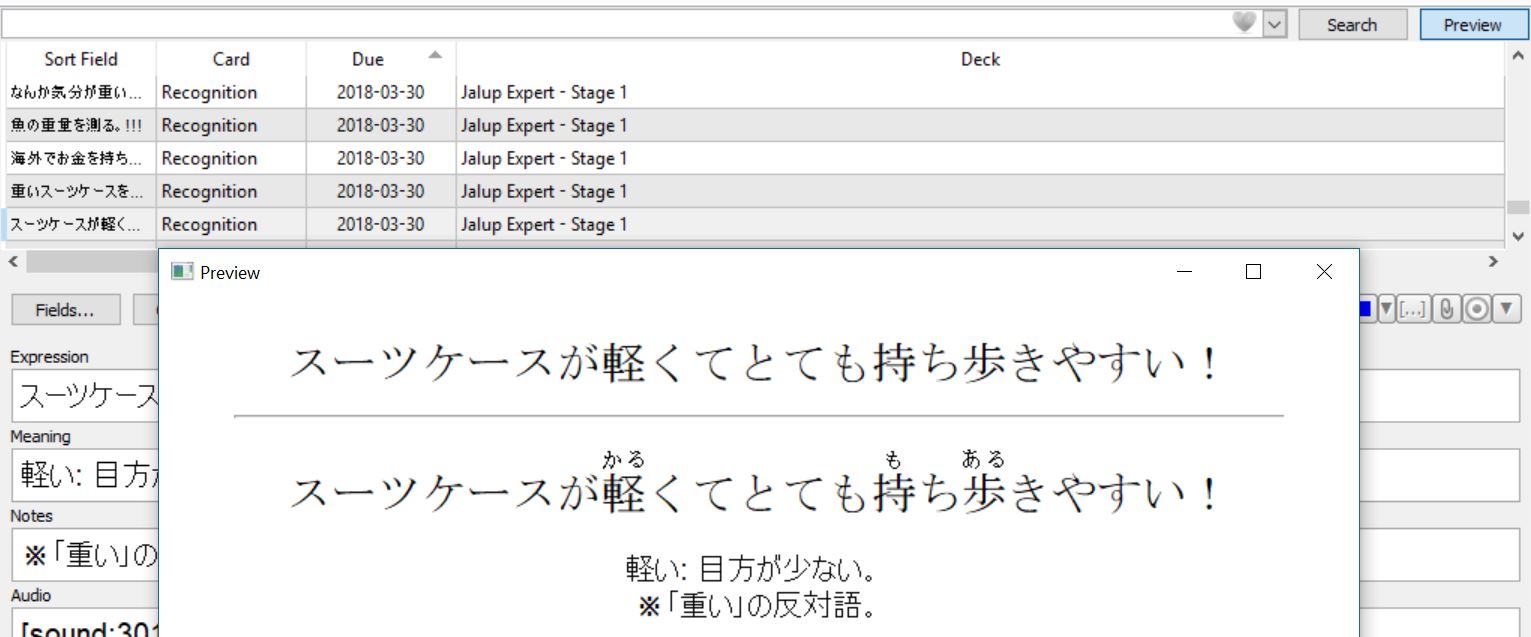
Your Expression field, meaning field, and reading field should be the updated content (mine has exclamation points for Expression), the notes field filled out (if there is a note for the card), and the audio should play. Make sure when you first sync to your phone, you give it some time. Suddenly adding 1,000 or 2,000 audio files can take time. Your phone may appear frozen, but it’ll eventually get them all in.
Congrats if you made it this far!
If you spot a mistake, or have a question, let me know in the comments.
In February of 2017, Jalup Kana, Beginner and Intermediate were massively updated to make them easier, including completely new and high quality audio for all 3. I recommend updating these decks if you purchased any of them before this date.
In February of 2018, Jalup Advanced was updated and new audio added. At the same, time the ultimate versions of Jalup Beginner, Intermediate, and Advanced were all released. These are serious improvements over all the decks taking from Jalup NEXT features, so if you purchased before than, you may want to update these decks.
In April 2018, the first half of Jalup Expert will be updated and new audio added.
Founder of Jalup. iOS Software Engineer. Former attorney, translator, and interpreter. Still watching 月曜から夜ふかし weekly since 2013.


Thanks so much Adam! I’m up to date with the ultimate versions now. I copied the new card HTML and styles in too, and I couldn’t be happier with the results. The audio is fantastic, and it looks perfect on my phone. :)
The ultimate versions have different fields than as described in your guide, but this was no problem. I made a small mistake with column order but Anki will undo an import with Cmd-Z, so it was easy to recover.
I’m glad it all worked without a problem :)
And yes you are right, this guide is done with a regular version of the Jalup decks, not an Ultimate version. As you found out, there are some slightly different fields, but this guide will still work for it the same.
I hope the updates power up your studying!
So, based on what’s said in this article, it’s a good idea to just wait until all 2000 audio files are done before doing this update to Anki so I only have to do it once? Or better yet, maybe I should wait for the Ultimate version? Unless the Ultimate version can’t be updated with my review information?
Well, the 2nd time around you can probably do this process much quicker. What takes so long the first time is familiarizing yourself with how to do it all.
The ultimate version can be updated with your review information, so that’s not a problem.
However, the ultimate version wouldn’t be released unless all 2,000 cards of expert are finished on Jalup NEXT.
Oops, of course, how stupid of me lol!
Thanks for the thorough explanation! I had merged all my sentences decks (Jalup Beginner, Jalup Intermediate, own sentences) into one deck so I had to make a couple changes to get this to work.
I ran into two problems: how to update the exported spreadsheet when it had multiple decks, and accidentally changing/deleting content from cards I didn’t want to because they had the same card type as the cards I was modifying. (Glad I had a backup!)
***
To fix everything being in one deck: pull the cards you’re trying to change into their own deck. Because my cards had tags of what deck they came from (in my case, ‘jalup-intermediate’), I could easily find only the Jalup Intermediate cards.
Modified Step 10:
Export to new deck:
* In browse, filter by tag (Filter > Tags > ‘jalup-intermediate’)
* Select all (ctrl+a)
* Right click > change deck
* Add deck (I called mine ‘jalup intermediate update’)
* Select new deck, Move Cards
Then export the deck you just created and continue.
At the end, once the deck is updated, move the cards back into the original deck the same way (Filter by deck or tag, select all, right click, change deck)
***
To fix accidentally deleting info from other cards of the same type: create a new card type for just the cards you’re modifying.
Modified Step 3:
Create a new card type and switch all the cards you’re editing to that new card type.
Tools > Manage Note Types > Add > Select “Japanese (recognition)” (or whatever note type the cards currently are) > Name something new (eg jalup-intermediate-update)
Select all the cards (possibly using the filtering described above), right click, Change Note Type, and select the note type you just created. Confirm the fields are mapped to the correct new field.
Make the changes in Steps 3, 4, 5 to this note type. In step 20 (importing), the type should be the new type you created. In Step 24, when deleting “Expression OLD”, if the number of notes it says it’s deleting from isn’t the same as the number you updated STOP! You should go back to the beginning and create a new note type.
At the end once the deck is updated, you can leave the cards as the new note type, or merge them with an existing identical note type (I left them as the new note type).
***
Hopefully that helps someone else!
Thanks Hwesta for adding in this explanation to help people who are in a similar situation!